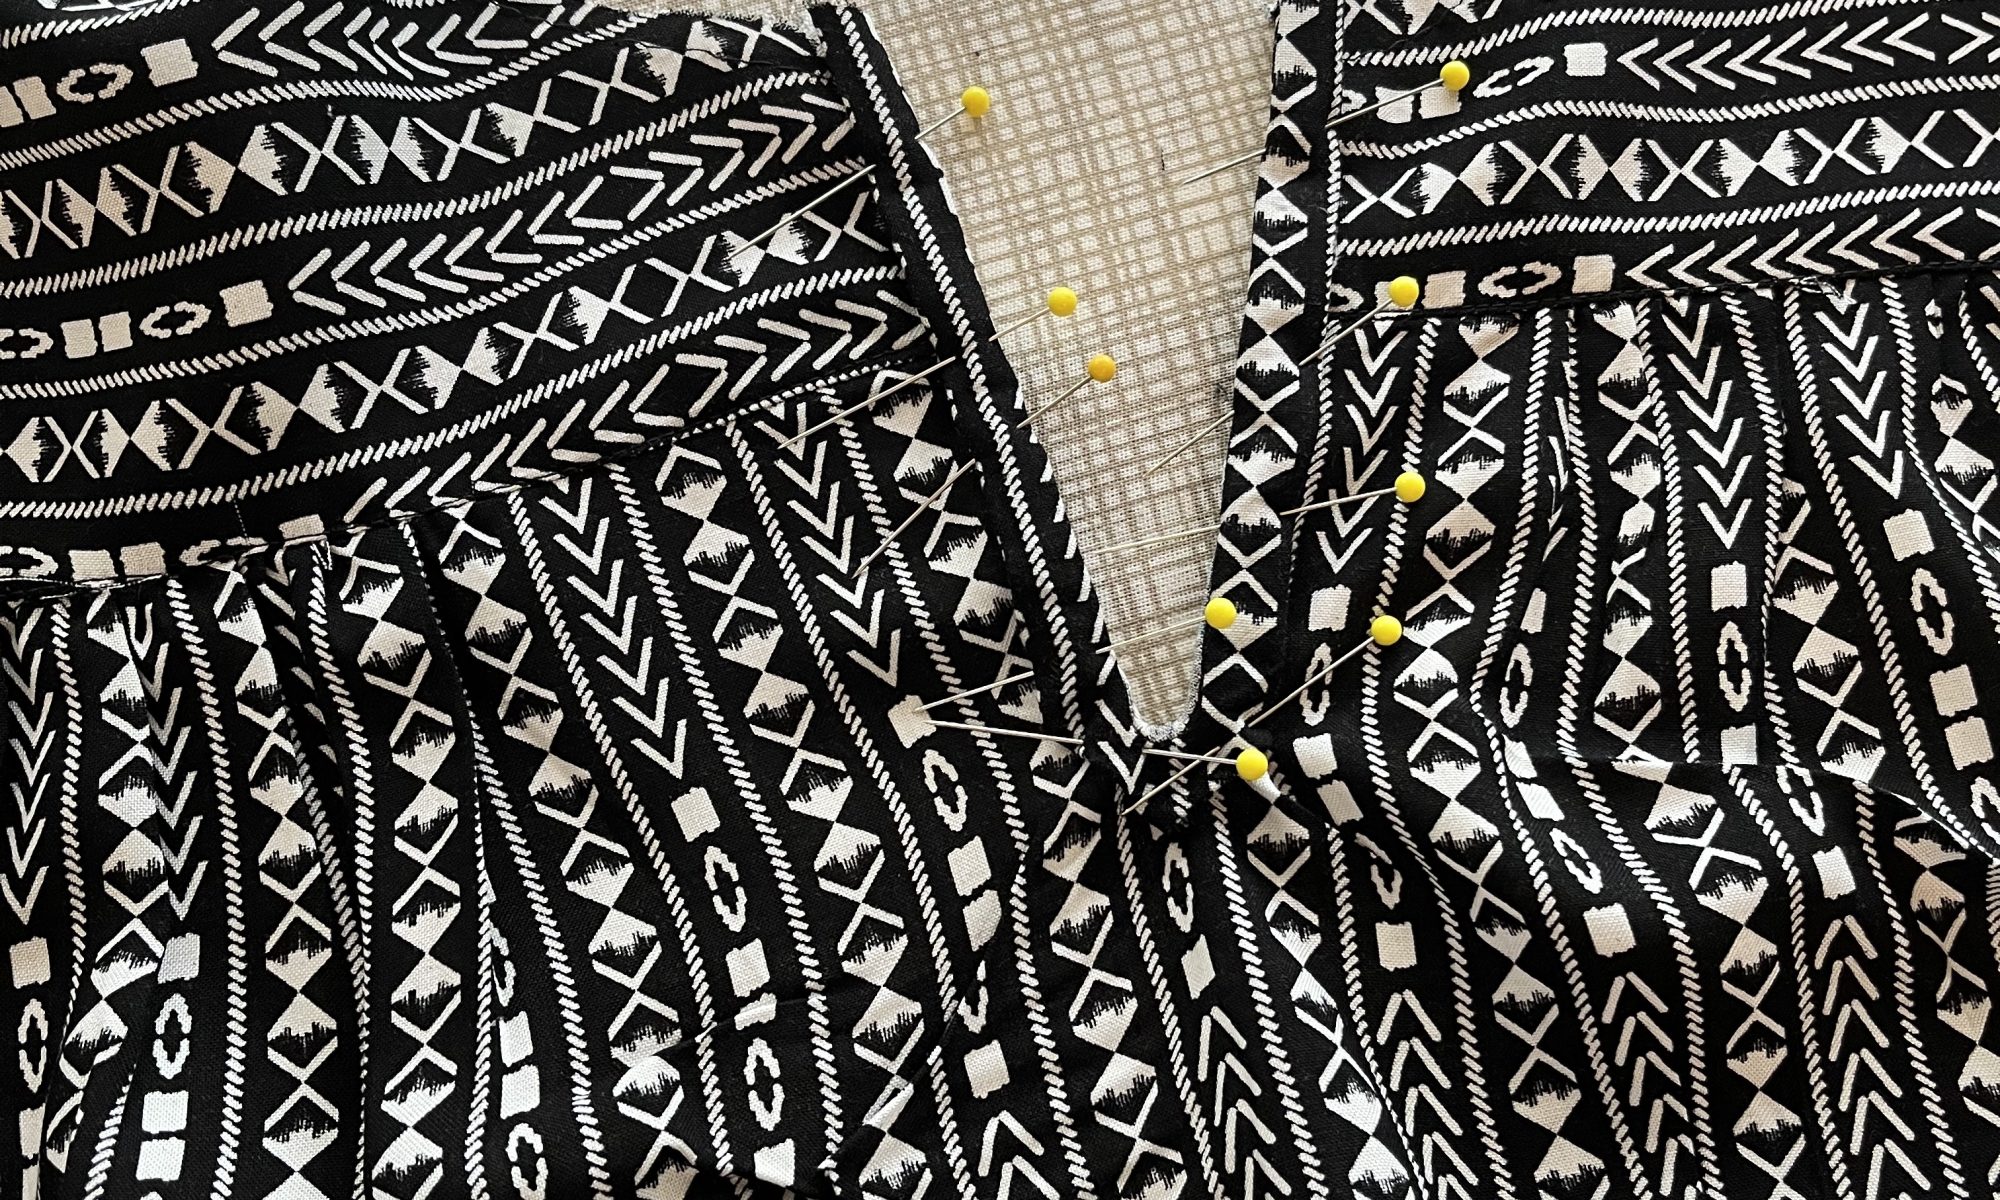
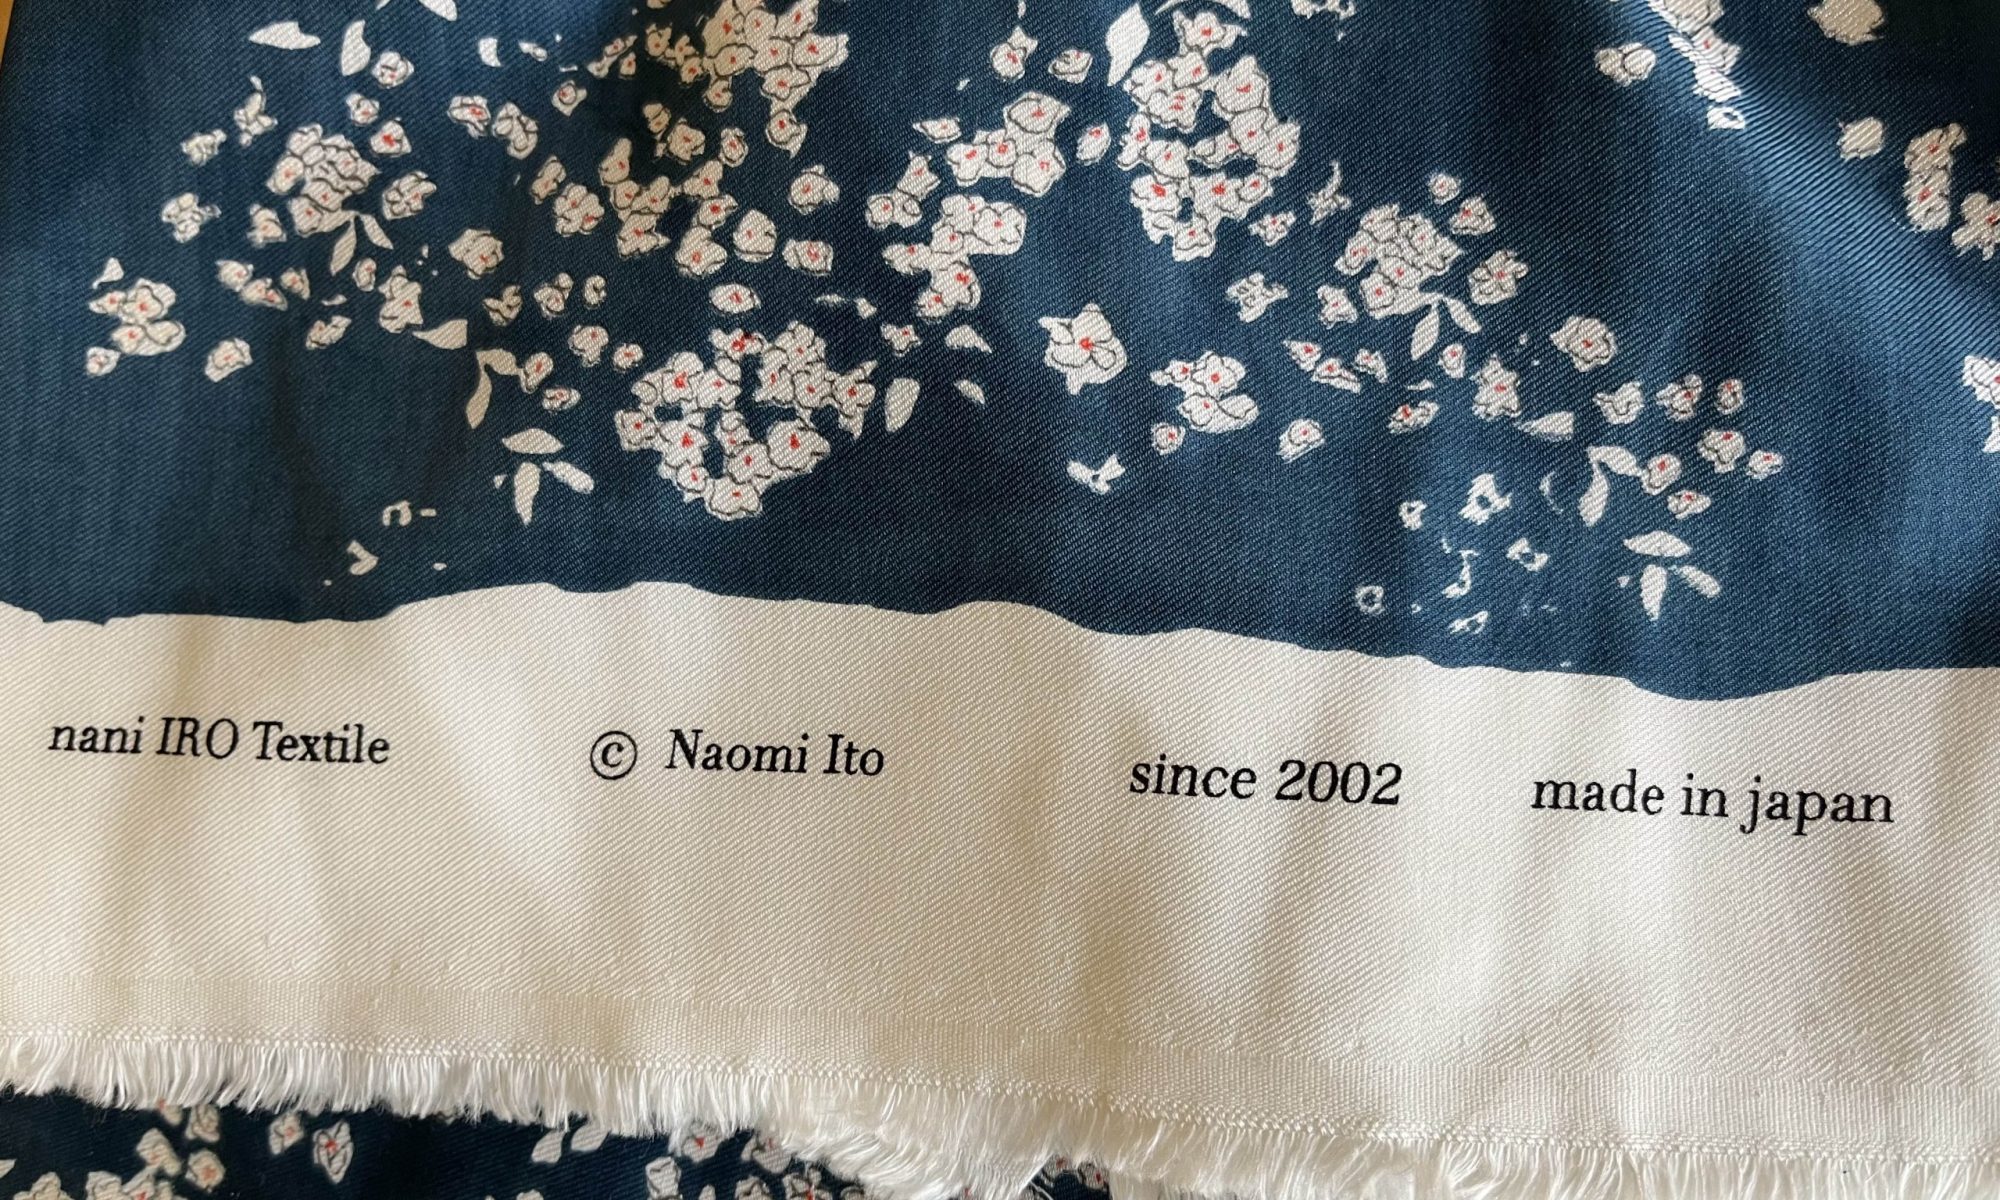
Nani Iro – Japanese dress project

Rows of books at a craft store.

I’m in London for the BETT show and starting my next project – the Short Sleeved Gathered Dress designed by Nani Iro. Next week I am heading to the Draper’s Daughter in Chichester, England to look for Nani Iro fabrics to make the dress.

Follow me on my [new] instagram page to see the project happen @katiedays_makes

You can find this pattern and many more in her book A Year of Sewing with Nani Iro.

Books helped me to start making clothes

Part way through the pandemic, I started visiting the book aisle of JoAnn fabrics craft stores where I discovered “My Felt Doll” by Shelly Downs. The patterns were pretty easy to follow and I made a few dolls.

My Felt Doll by Shelly Downs

I found myself returning to the book aisle at the craft store because it provoked my curiosity. I think I forgot the peace that came from undistracted creativity. There were no intrusive thoughts from digital ads popping up to affect my concentration.

Along the way, the craft books below rekindled my love of sewing and I made a few more things. It felt so refreshing to find a project in a book and create it — all without getting side tracked on the internet.

From doing these simple crafts, I got interested in making clothes and started purchasing patterns. First, in January of 2021, I made this pattern:

It said “easy”, but a lot of it was hard for me.
Skirt selfie.
I love the print on this fabric. It was good for hiding my mistakes.

Then, in January of 2022, I made this pattern:

I did pattern A – and yes, it has pockets!

After making garments from scratch, I tried modifying existing garments by sewing electronics into them.

I wore my jacket (arm covering electronics) and skirt to a special event hosted by Infosys Foundation USA for International Day of the Girl in October 2022. (Matching the sign was a coincidence..!)

Back to the book aisle at JoAnns

Around November of 2022, I was back in the book aisle at JoAnn Fabrics and found the Nani Iro book, A Year of Sewing with Nani Iro. I love it because it not only lays out the patterns, but clearly walks you through each of the steps. The two clothing patterns above (skirt and dress) were only possible with help from an expert. Even though the patterns were labeled “simple” and “easy”, there was a lot left unexplained in the pattern.

Nani Iro’s book coupled with how-to videos from the publisher make this a great solution for a newbie clothing maker. The book’s photography, binding, art, paper selection, font, and so much more also have the subtle elegance of Japanese art and design. Reading this book with a cup of a tea is its own special delight.

Well, now I’ve picked out my pattern (Short Sleeved Gathered Dress), so it’s time to pick out fabric. I’ll do that next week in Chichester, England at the Draper’s Daughter fabric shop. Come back next week to see the fabric I’ve picked out.

In the meantime, I hope you might get a chance to visit your favorite book aisle, whether at a book shop, a library, or your local craft store.

-KatieDays

If you are interested, here are the four videos for the process of making the Short Sleeve Gathered Dress in her book A Year of Sewing with Nani Iro:

NeoPixel Hedgehog Necklace

Mocha the hedgehog wearing her new NeoPixel necklace – designed by students in Street Corner STEAM.

NeoPixel Hedgehog Necklace

In this activity guide, you will learn to program an infrared remote control to change the color of lights on a NeoPixel strip.

Total read time: <7 minutes

Skill level: Beginner

Street Corner STEAM

On Wednesday evenings, I lead a free STEAM activity in a location that also serves free meals. Activities are designed for 10-12 year old students, but in reality we have five-year-olds through senior adults who attend. There are three activity tables: sewing, painting, and drawing, as well as one special project I bring each week – such as this one. The goal of Street Corner STEAM is to offer socially-distant and spontaneous play to build skills and confidence with technology. Below you will see pictures from Street Corner STEAM.

Materials for this project:

There are five main electronics parts for this project.
  1. micro:bit – Go pack – $18.00 (set of 10 – $160.00)
  2. basic:bit – $4.99 – 1 per project
  3. NeoPixel Strip – $4.99 – 1 per project
  4. Infrared receiver sensor – $2.90 – 1 per project
  5. Infrared remote control – $4.95 – 1 per project
  6. Free software: MicroBlocks

Note: These materials are fully reusable.

Optional:

A stuffed animal or toy

If you want to help a group to create their own toys, I like this kit: Woodland creatures felt animal kits – 12 sewable felt kits – $22.99, but you can also make your own toys basically for free from old socks

Connecting the electronics

Use the five screws that come with the basic bit to connect it to your micro:bit.
There are three pins available to you: Pin 0, Pin 1, and Pin 2.
The NeoPixels are plugged into Pin 0 and the infrared sensor is plugged into Pin 1.

When you attach the NeoPixel strip and infrared sensor, be sure to line the black wire up next to the letter /G/ which stands for ‘ground.’ If you plug the wires in backwards, your program won’t run properly. Make sure the slide switch on the basic:bit is set to ‘P0’, not to the speaker.

Get to know your materials

  1. Connect your micro:bit via USB to your computer.
  2. Open MicroBlocks and be sure you have a green circle in the top left corner.
  3. Add the NeoPixel library to MicroBlocks.
Connect your micro:bit via USB to your computer. Then, open MicroBlocks and be sure that you have a green circle in the top left corner.
Add the NeoPixel library to MicroBlocks.

At this point you can play with the NeoPixel library. Below is sample code I shared with the students in Street Corner STEAM. With these code snippets, they were able to create new scripts.

Starter scripts for students to get to know their materials.
Zoomed in picture of code from video above.
Get the free MicroBlocks NeoPixel activity card here: https://microblocks.fun/cards/mb_NeoPixels.pdf
Getting the NeoPixels to come on for the first time is always exciting 🙂

Infrared sensor and remote control

Infrared light is invisible to the human eye, but if you look at it through the lens of a video camera, including most cellphone cameras, you can see it. Below is a way to use the remote control with your NeoPixel strip.

If you look at the tip of your infrared remote through a video camera, including most cellphone cameras, you will see the light.
Pressing each button on the infrared remote control causes a series of flashes with a UNIQUE pattern of delays.
How can we use these unique signals in our code?
Zoomed in picture of code from video above.
Here is one way to find the unique signal for each button on the remote. Don’t forget to add the IR Remote library to your tool bar. See how here: https://microblocks.fun/cards/mb_IR_Remote_Control.pdf
Zoomed in picture of code from video above.
Students used the code in the picture above to check the value of each button press on the remote control.
Students recorded the value of each button press on the remote like this.
Bring it all together and use your IR remote to control your NeoPixel necklace
Zoomed in picture of code from video above.
Mocha is seeing her new necklace for the first time. She likes it 🙂
A happy hedgehog

NeoPixel and IR activity cards for your students

https://microblocks.fun/learn#activity_cards

These potatoes can do what my computer does

What you get in this post: Seven activity ideas for exploring coding and electronics, including printables, slides, a materials list, and sample code. The first activity is ideal for students as young as 8.

I used to think coding was overwhelming – that for every one thing I learned, there were a million more that I would never learn. Coding felt like a list of endless and unknowable details that I would drown under. But through activities like this potato battery experiment, I’ve learned that’s not true. Whether you code with a single block of code or 86 million lines of code, you’re doing the exact same thing: playing with electricity.

One russet potato cut into four parts and used to power an LED. Click on the activity sheet below for a materials list and printable diagram to try this experiment with your students. [Photo: John Maloney]

Connecting a potato battery to an LED allows current to flow, making the LED light up. My computer works the same way: tiny transistor switches control the flow of current in millions of tiny wires. Although my computer has a lot more wires and switches, at the lowest level it is just turning things “on” and “off” with electricity, just like my potato battery.

After I realized that, coding and electronics were no longer overwhelming and I started to play. Anyone creating technology – making us laugh with animated films, healing us with medicine, keeping us safe while we travel – is taking up tools to do one thing: creatively move electrons.

I hope the activities below will help you to think of electricity as a raw material that you and your students can play with.

Getting started playing with electricity

In this hands-on activity, students will create a potato-powered night light by connecting several potato “battery cells” in series to light an LED. In an optional extension, students can experiment with different colored LEDs to discover how many potato cells are needed to light each color. Finally, they apply what they have learned by designing (on paper) their own night lights. This potato-battery night-light project was created by John Maloney and myself.

A simple diagram to illustrate the photo above

Ellie needs help from her sister

Sara and her little sister Ellie are home alone when a big storm makes the power go out. It’s getting dark, and Ellie is afraid. Sara knows that even a small light would comfort Ellie but, unfortunately, their flashlight doesn’t work. However, Sara recently learned how to make a battery in science class and, even better, she still has some LEDs from that class in her backpack! In science class, they made lemon batteries, but Sara remembers that her teacher said that potatoes might also work. After a quick search, she’s found everything she needs. Can she put the pieces together to light up the LED and keep Ellie from being afraid?

Lesson plan ideas, including materials list

Resources for your students (Make a copy of these slides)


What comes after potato batteries?

A picture like the one below is a good example of something that used to intimidate me (and sometimes still does). However, instead of feeling like I am about to drown, now I just think of the potatoes in the experiment above.

Materials: micro:bit, sensor:bit edge connector, breadboard, and 7-segment display.

Look closely at the 7-segment display plugged into the breadboard above (only three of the seven segments are lit up). Each segment is like a single LED from Sara and Ellie’s nightlight project above. One wire is connected to one LED segment on the display. The picture above is like setting up seven potato battery experiments, one potato battery experiment for each LED segment on the display.

However, in the potato battery experiment, I had to clip and unclip the wires to make the LED turn on and off. In this set up, I can write code to turn the LED segments on and off. The 7-segment display stays wired up, and my code turns the lights on and off.

Each section of a 7-segment display is named with a letter. By turning some sections on and others off, you can display numbers 0-9. [Image from: https://www.electronics-tutorials.ws/blog/7-segment-display-tutorial.html]
Using MicroBlocks to program my seven segment display

Bridging potatoes and 7-segment displays

Going from potato-powered LEDS to programming 7- segment displays isn’t as big of a leap as you might think.

You can start by plugging your potato-battery into the computer using a micro:bit and measuring the voltage of your potatoes using MicroBlocks.

A reading of 267 equals about .75 volts. If one potato cell equals about .75 volts, approximately how many volts do you think all four potato cells make?

Step 1: Connect the potato cells in series (as described in the activity sheet above).

Step 2: Connect an alligator clip to pin 1 of your micro:bit (I did this with a yellow wire in the picture above). Then, connect a second alligator clip to the GND pin on your micro:bit (I did this with the green wire in the picture above).

Step 3: Open MicroBlocks and create a script that reads the analog value of pin 1. Above I am using the “say” block to show the number on the screen. 1.5 volts will read as about 500.

Step 4: Measure the voltage of one potato cell. Clip the yellow wire to a penny and the green wire to a nail. Write down the number you see (For me, it’s 267 in the picture above). Then, move the green wire to the nail of the next potato (keeping the yellow wire on the penny of the first potato). What number do you see now? Do this two more times, moving the green wire to the next nail each time.

Step 5: How many volts does your four-cell potato battery generate?

Another way to play with electricity

Here is another way to use MicroBlocks and your micro:bit to play with electricity as a raw material.

This activity card and more like it can be found here: https://microblocks.fun/learn#activity_cards
The activity card above is the same activity as using a voltmeter to measure voltage.

From potato-powered to micro:bit-powered

The LED above is drawing electricity from the micro:bit (not potatoes).

Instead of clipping and unclipping the LED to turn it on and off (as I had to do with the potatoes), I can code the A button on the micro:bit to turn the LED on and the B button to turn it off. In other words, pressing A switches electricity to flow and pressing B stops electricity from flowing.

These scripts were written using MicroBlocks.

Draw and play with electricity

While exploring electricity as a raw material, I like to sketch and write what I am learning.

Programming a relay to control an LED.
Sketching and building a circuit allowing either of two switches to turn an LED on or off.
On the left I am making a truth table to illustrate the circuit’s activity. If you’ve ever turned lights on at the top of a staircase, walked to the bottom of the stairs, and turned the lights off as you go out, you’ve used a circuit like this.

Tiny electronics

With the power of coding, you can create anything! Below is an example of electronic jewelry that communicates secret messages by fast-flashes of light. 1 flash = A, 2 flashes = B, and so on.

Geo (left) is wearing an LED powered by a micro:bit and D (right) is wearing a light sensor powered by a micro:bit.
D’s name is short for Decipher. She deciphers the secret message flashing on the LED with her light sensor.
Geo’s name is short for Geologist (she loves collecting rocks and minerals). She is sending a secret message to D with flashes of light on her LED bracelet.
This is the code powering Geo’s LED bracelet. Remember: We are only playing with electricity. Letter A needs to flash once, Letter B needs to flash twice, etc. So when I type a message to send, the code on the right looks at each letter and decides how many times to flash.

Here is a link to download the sending code and the receiving code: https://drive.google.com/drive/u/2/folders/1W4fOoJEPJMP-OjdQP1pdXvvBDW3WWkiN

Want more programming fun?

Try coding your own flashlight tag game to play with friends – it’s like laser tag, but with flashlights! Use the activity cards below to help you. Find more activities here: https://microblocks.fun/learn#activity_cards

[Photo from: https://microblocks.fun/learn#activity_cards]

Thank you for stopping by!

I can’t wait to see what you make.

-KatieDays

For Girls Tinker Academy, Sonoma State

Create a loveable robot pet with the micro:bit. How does your pet show love? How does your pet receive love? 


source: microbit.org

SENSE 

Buttons A and B

Tilt Sensor (accelerometer)

Compass

Thermometer

Light Sensor

Radio Communication (kind of an action too)

THINK

Write code for your loveable pet

ACT

25 leds

sound


Activity  1 – Program LEDs

Try this code to give your animal a beating heart animation with the micro:bit

source: microbit.org


Activity 2 – Program buttons to control LEDs

Try this activity to use the buttons with your micro:bit

source: microbit.org


Activity 3 – Learn to use other features of your micro:bit

source: microbit.org

  1. Go here: Make it: Code it projects
  2. Select the feature you want to use in the search filter on the left


Craft a loveable pet from a sock

One way to make a sock bunny:

One way to make a sock bear:

Pay attention to the location of the “heel” of your sock. There is extra fabric there to stuff and shape.

This bear uses 1 sock, 4 rubber bands, and I hot glued the top down.

I created the owl by accident. Here is the process of making the owl. 


I stuffed the sock with stuffing, and twisted a rubber band around the sock. Then, I added more stuffing, folded the top of the sock down and hot glued the top of the sock in place. You could sew the top of the sock in place if you don’t have hot glue.

I drew a wing-shape that I liked onto paper, then cut it out of felt. I cut a total of four wing shapes because it took two wing shapes to make one wing.

I sewed the wings together (two wing-shapes per wing) and stuffed them with stuffing. Then, I hot-glued them to the owl (but you could sew them on as well).

What kind of loveable pet will you create? 

Help Pete Find His Beat

Skills

  • Use physical objects to control digital animations and sound
  • Use math (you won’t realize you did)
  • Use music (you’ll probably realize you did)

What you get

  • Three ways to help Pete find his beat using micro:bit, MaKey MaKey, and Scratch
  • Loads of supplemental teaching resources for music, coding and Scratch 3.0

A sock-bunny, a micro:bit clipped to a glove, and a MaKey MaKey. These are all the first drafts of my attempts.

Most people don’t know this, but there is a reason Peter Cottontail always came hip-hoppin’ down the bunny trail. 

He was a famous DJ, and he loved to make music. Though the secret to his music lived in his tail.

One day a terrible DJ accident happened and Peter lost his cottontail.

Now he is just known as “Pete who lost his beat.”

Can you help Pete find his beat? 

Part 1  – Make Pete, micro:bit glove, and MaKey MaKey dance pad 

Materials:

Pete: 1 sock, fist-full of stuffing, two rubber bands, and scissors

micro:bit glove: glove, binder clip, micro:bit with battery pack

MaKey MaKey dance pad: 1 file folder, aluminum foil (about the size of half a sheet of computer paper), glue, scissors, MaKey MaKey

First, make Pete.

Pete is a sock bunny.

Pete is just a sock bunny. Follow this tutorial to make your own. If you don’t like this tutorial, search “No sew sock bunny” to find many versions. You can also search “No sew sock animal” to finds lots of other creatures to make with a sock.

Materials: 1 sock, fist-full of stuffing, two rubber bands, and scissors.

Glue a piece of foil onto the bottom of Pete. This will help him to dance on the MaKey MaKey dance pad.

Glue foil onto the bottom of Pete. This is how Pete will complete the circuit on the MaKey MaKey dance pad.

Second, make your micro:bit glove.

Materials: glove, binder clip, micro:bit with battery pack

Clip the micro:bit to a glove with a binder clip. Connect the battery pack and slide it into the glove.


A deleted scene from Stranger Things when the micro:bit starts to flash lights and communicate a message from another world. Just kidding.

Get your micro:bit glove ready to control Scratch

Go to this website: https://scratch.mit.edu/microbit

1.) Install “Scratch Link”

2) Install “Scratch micro:bit Hex


Third, Make MaKey MaKey Dance Pad 

Materials: 1 file folder, aluminum foil (about the size of half a sheet of computer paper), glue, scissors

It would be fun to redesign this as a bunny trail for Pete to come hip-hoppin’ down. Or the surface of Mars. It’s really up to you

Pete will dance to the left in Scratch when he is in this position.

I gave Pete three moves  on my dance pad, though in the picture above, only move 2 is connected.

  1. When Space Key Pressed
  2. When Left Arrow Pressed
  3. When Right Arrow Pressed

See all three moves on the MaKey MaKey dance pad in action here (video starts immediately with dance moves).

Now you should have a sock animal, micro:bit glove, and MaKey MaKey dance pad.


Part 2 – Coding in Scratch

Open Scratch and add the micro:bit and MaKey MaKey extensions.


Choose a stage and sprite that you like. I took a picture of Pete and uploaded him into Scratch to use as my sprite. 

I used this video to help me to remove Pete’s background in Scratch.

Now, help Pete find his beat. Try this code. How else can you help Pete? 

See this code in action with the micro:bit and MaKey MaKey (video starts immediately at code in action).

Have fun! I can’t wait to see how you help Pete to find his beat.  <3 KatieDays


Want more with music, coding, and Scratch 3.0 ? Thank you to Jared O’Leary from BootUpPD for sharing these resources with me.

Jumping Game with Music- https://scratch.mit.edu/projects/75311050/

Jumping Game with Sound Effects-https://scratch.mit.edu/projects/78887338/

Toggle Music with a Button-https://docs.google.com/presentation/d/1pLnYS5j_20OrqzVdk5hPMTIip8scpEkaXqo-lCbZKWE/edit?usp=sharing

Create  Music Player-https://docs.google.com/document/d/1vgbzvO_I4vEIEvYxRZehxuLu6c7vt8s5Mr97o1LKq3o/edit?usp=sharing

Make Music with Ten Block Challenge- https://docs.google.com/document/d/16t0p6zIsFabKhmXKaTZSIxs1nxejegQukmz1MjpFt-c/edit?usp=sharing

More resources from Jared himself-                  https://jaredoleary.com/music-coding

Beatbox Machine- https://docs.google.com/document/d/1C0DpoBDRHdbIWs4hcn7g4HjI86Mpjv2U2blGjjFT20k/edit?usp=sharing

This blog post was created from the ideas shared by Colleen Graves and Katie Henry in the two webinars below. 

Let’s Invent! Celebrate Scratch Month with MaKey MaKey and micro:bit!

Let’s Invent! Celebrate Scratch Month Episode Two with MaKey MaKey and micro:bit!

micro:bit maracas with microBlocks

micro:bit maracas with microBlocks

What you get below:

  • materials list

  • sample code

  • extension idea


Materials list

  1. microBlocks (free download)

  2. micro:bit  $17.50

  3. mi:sound board from Kitronik $6.50


Using microBlocks to program maracas


Attaching the speaker with alligator/crocodile clips

I used the mi:sound board from Kitronik


Extension idea: Attach your micro:bits to gloves using rubber bands or Velcro. Then, wave your hands around to make music.


Get started with micro:bit + Scratch

Get started with micro:bit + Scratch

What you get below:

  • 4 simple activity cards with quick demo videos

1) Move 


Activity card created by Scratch Team at MIT


2) Tilt 

Activity card created by Scratch Team at MIT


3) Shake

Activity card created by Scratch Team at MIT


4) Jump

Activity card created by Scratch Team at MIT


Face-tracking Flappy Bird Game in Scratch

What you get below:

1. Copy the Code – tells you how to copy the game you see here

2. Hack the Code – gives you ways for students to modify the existing code

3. Teach Students – A suggested instructional sequence for helping students to build their own games from the ground up.

COPY THE CODE

1) Use this link to open Scratch: https://champierre.github.io/scratch3/

2) Click on the “Add extension” icon (bottom left corner)

3) Scroll down and select “Facemesh2Scratch” extension.  Note: It will take a while to open. Your computer will look like it’s locked up, but it isn’t.

4) Download this Scratch code:  https://drive.google.com/file/d/1oBknAF2ihOVd1cYClAh-6mx6CyfTEc9I/view?usp=sharing   (Open the link. Then, right-mouse click on the file and select “download”

5) In Scratch, select: File –>  open, and open the code you downloaded in step 4.  (Be sure to open that code AFTER you do steps 1-3. The Facemesh2Scratch extension has to be open first.)

6) Click the green flag and start playing the game.

Julia Dweck (@giftedtawk on Twitter) does push-ups to play a Flappy Bird game created in Scratch.

HACK THE CODE

Q: How can I speed up the scroll?

A: Increase the speed of the “glide.”

Q: How can teachers suggest students modify the code?

Simple:

  1. Increase speed of the game
  2. Change the Flappy Bird sprite to your favorite character
  3. Reduce distance between the pipes

Intermediate:

  1. Play a sound when the Flappy Bird touches a pipe
  2. Create a score board. Add a point when Flappy Bird makes it through a pipe. Lose a point if Flappy Bird touches a pipe.

Design thinking: 

  1. Create a fun game for others who are in quarantine and not moving as much. How can you help more people move in a fun way? Not everyone can do push-ups. What other kinds of movement can you inspire with your game?

TEACH STUDENTS

Q: What is the easiest way to share code with students?

A: Students need the Facemesh2Scratch extension loaded in Scratch before they open the code linked in the above section “Copy the Code”. Follow steps for “Copy the Code” above to share with students.

Otherwise, consider creating your own instructional sequence. 

STEP ONE  – Students open Facemesh2Scratch  extension in Scratch.


1) Use this link to open Scratch: https://champierre.github.io/scratch3/

2) Click on the “Add extension” icon (bottom left corner)

3) Scroll down and select “Facemesh2Scratch” extension.  Note: It will take a while to open. Your computer will look like it’s locked up, but it isn’t.

4) Practice using this code to see what happens.

STEP TWO – Learn to create scrolling sprites.

Does anyone in your class know how to do this? Let them teach others. Students can also use tutorials, such as the one below.


STEP THREE – Students identify problems to solve

What problems do your students still need to solve in making their game?

Form interest-based groups around remaining problems using a platform like Flipgrid. Allow students who are trying to solve similar problems to work together. Get the students name their own problems and find people who share similar problems.   Don’t go too fast at this step.  There is a lot of learning in being able to name the problem you are trying to solve. Answer their questions with questions.

Encourage them to:

  1. Name the problem
  2. Identify resources they already know about that could help
  3. Identify resources they wish they had
  4. Ask them how they can obtain the resources that they wish they had.
  5. There will likely be many problems. Ask them to focus on the hardest problem first. 

Places to find resources they will possibly need:

Youtube Scratch tutorials

Scratch community help pages

Identify an expert in the field to reach out to


Have fun.

<3

-KatieDays


css.php